
One of the most comment questions I get asked is
“How do you make your eyes on your amigurumi?”
I use a technique called “needle felting” to create eyes and other features on my amigurumi. Needle Felting is another kind of fiber art medium. It uses a special kind of needle called a “felting needle” that has tiny little barbs along the shaft of the needle. These needles are used with bundles of roving wool to create 3D sculptures. As the wool is repeatedly stabbed with the needle, the tiny barbs catch the wool fibers and pushes them into each other, condensing the bundle of wool into a solid object.
How is it used on Amigurumi?
Needle felting can be used to create all kinds of details on amigurumi pieces. It’s my favorite way to create eyes on my dolls. By placing the roving wool onto the surface of the amigurumi and repeatedly stabbing with the felting needle, it will stick and conform into the yarn.
Here is a quick guide on how I use needle felting to make eyes.
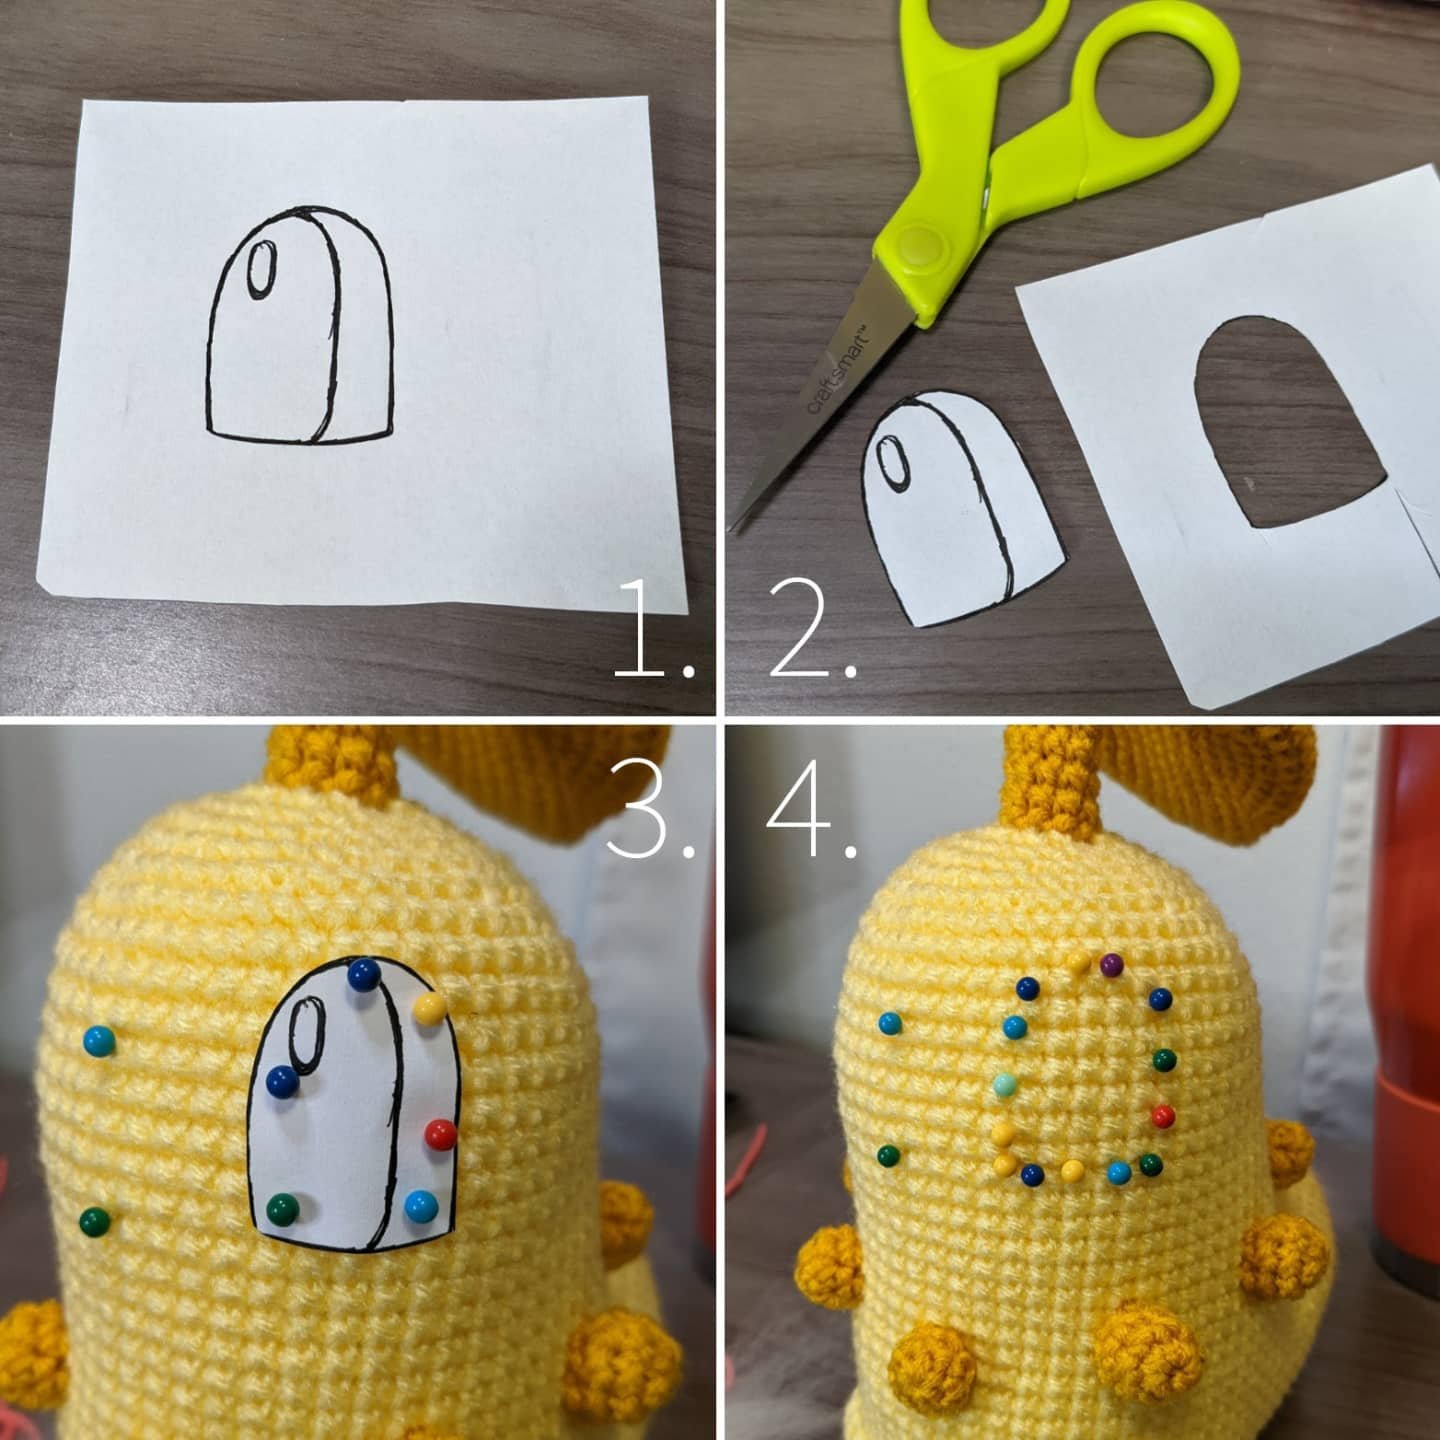
First I make a template for my eyes by drawing it on a sheet of paper. I cut it out and pin it to the face of my amigurumi project.
In the 4th pic there is an optional method shown: if I don’t feel like drawing, I can make an outline of an eye using pins! Using pins is also useful when I am using roving wool to make a line, such as a mouth line or eyebrow. I can plan out where the lines/details will be with my pins, then trace the line when I am applying the wool.
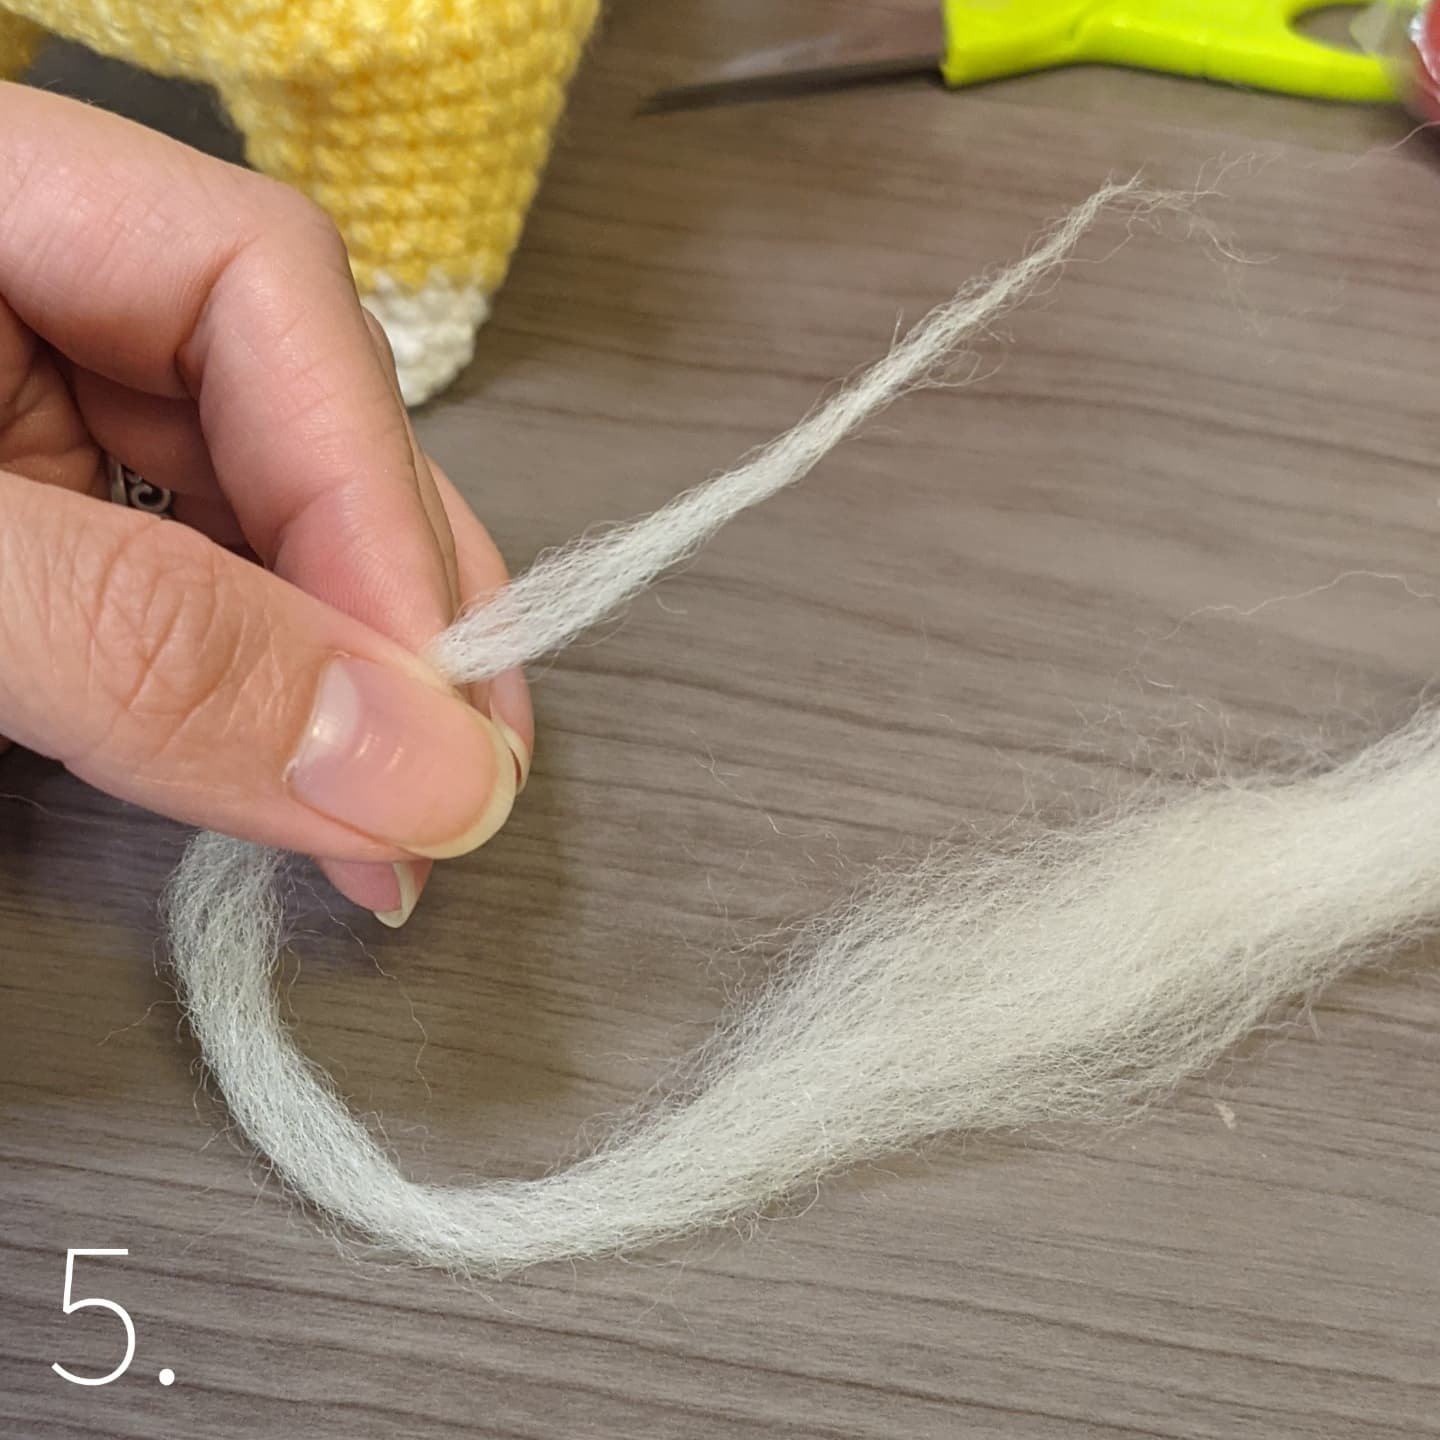
Pull a long thin strand of your white roving wool from your bundle of wool, or whatever color you prefer for the base of your eyes. Twist it to condense the fibers. This will give us a long thin strand of wool that we can use to begin outlining the eye.

Pin the eye template to the face of the amigurumi. Take your felting needle and roving wool and begin to felt around the eye template to make an outline of the eye. Remove the template and fill in with white roving wool.
My favorite felting tool to use here is the Pen Style Needle Felting Tool that is made by Clover. You can use one felting needle for more detailed work and lines, or you can use up to three needles at once which is useful for working with a larger amount of wool.
The Pen Tool can be found HERE

Once you have finished filling in the first eye, flip the eye template horizontally and use it for the outline of the opposite eye.

Take a thin strand of roving wool in the color you want for your iris/pupils. Twist the strand to condense the fibers and use your felting needle to outline the pupil, just like we did with making the first outline. Then fill the outline with the iris/pupil color of your choice.
Tip: If you are finished with the template that you drew, you can cut out the pupil/inner details and use it as a template as you make the pupils. This can help keep things symmetrical if you do not want to free-hand the pupil shapes.
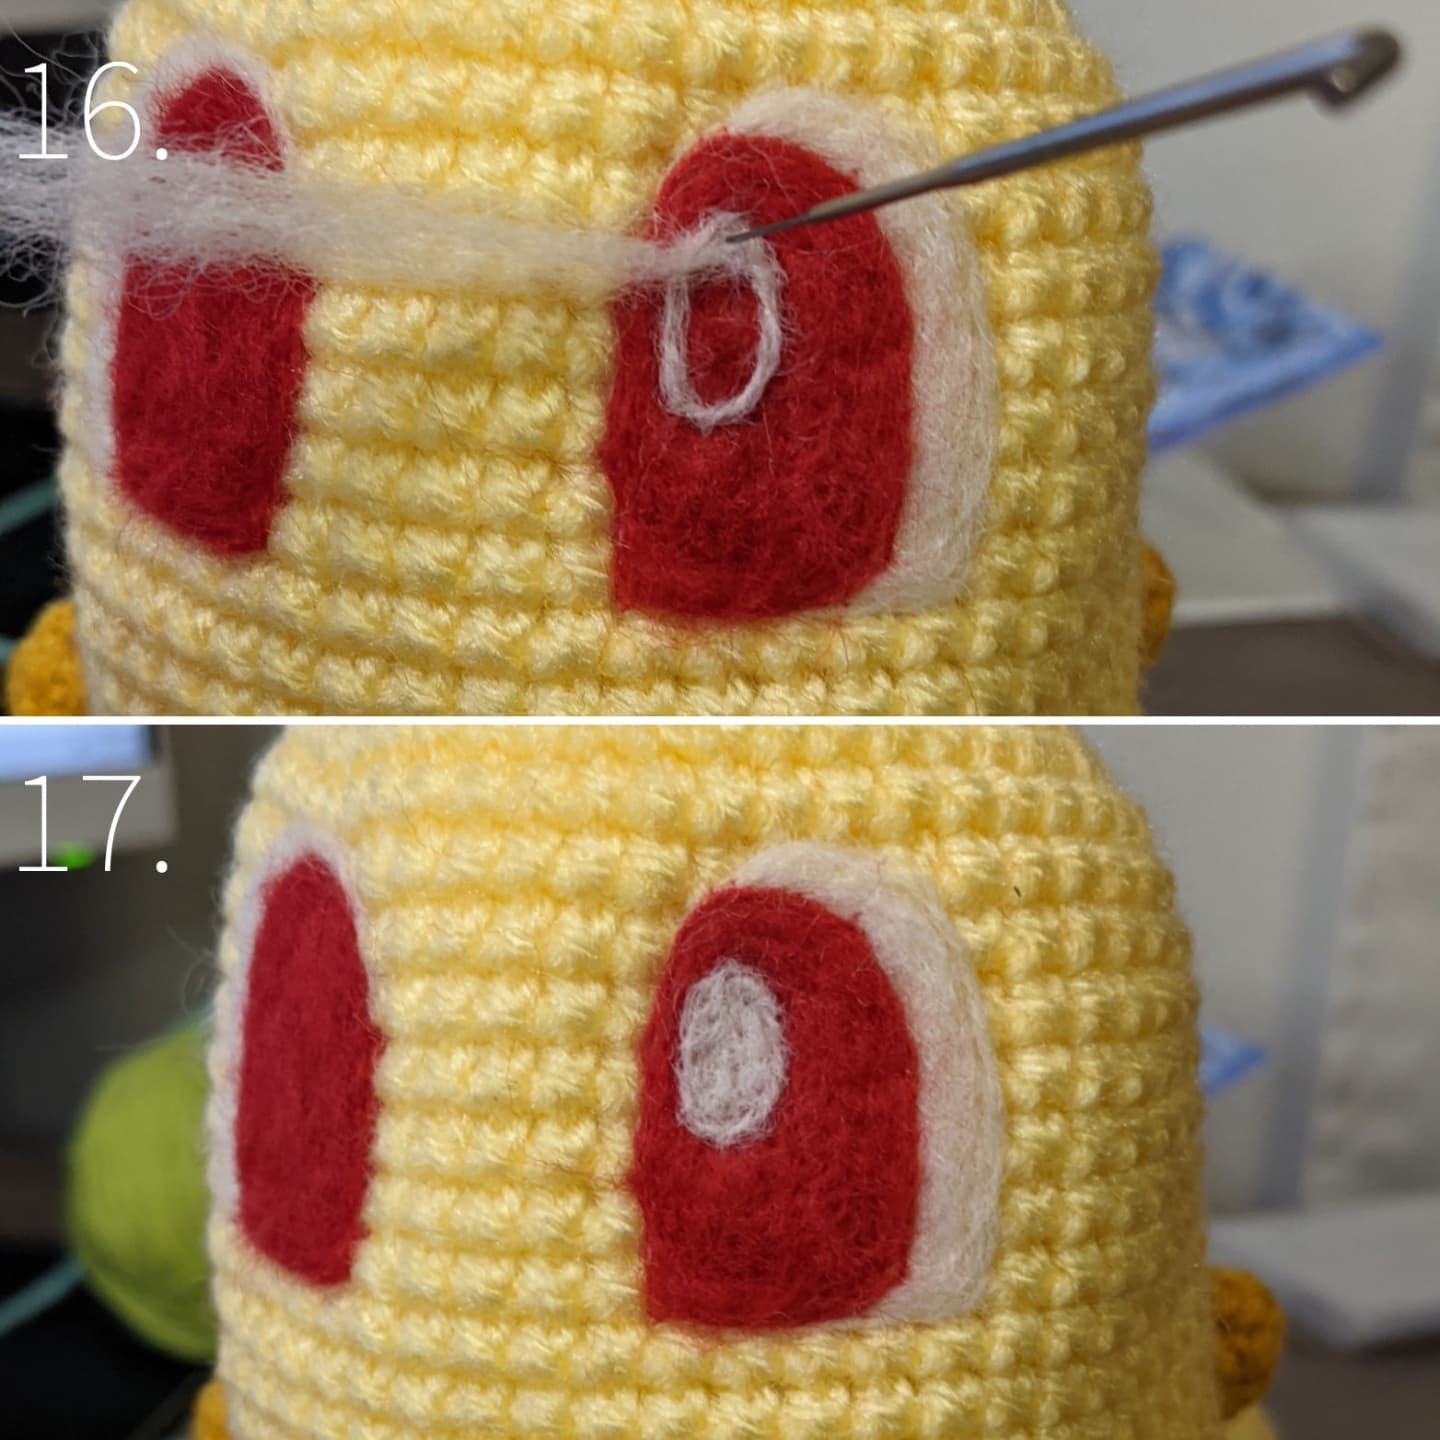
Finish by giving the eye a highlight or other small details!

I hope this guide was helpful to those curious about using needle felting on their amigurumi projects!
-1Up Ashe